Creating an Advance/Itinerary Report
Advance Notes and Report (Protection Level Subscribers)
Administrators, agents, and vendor agents can add notes and upload images, documents, and links to a location within the plan/request.
Click on the “Transportation” page.
Click on the transportation plans/request.
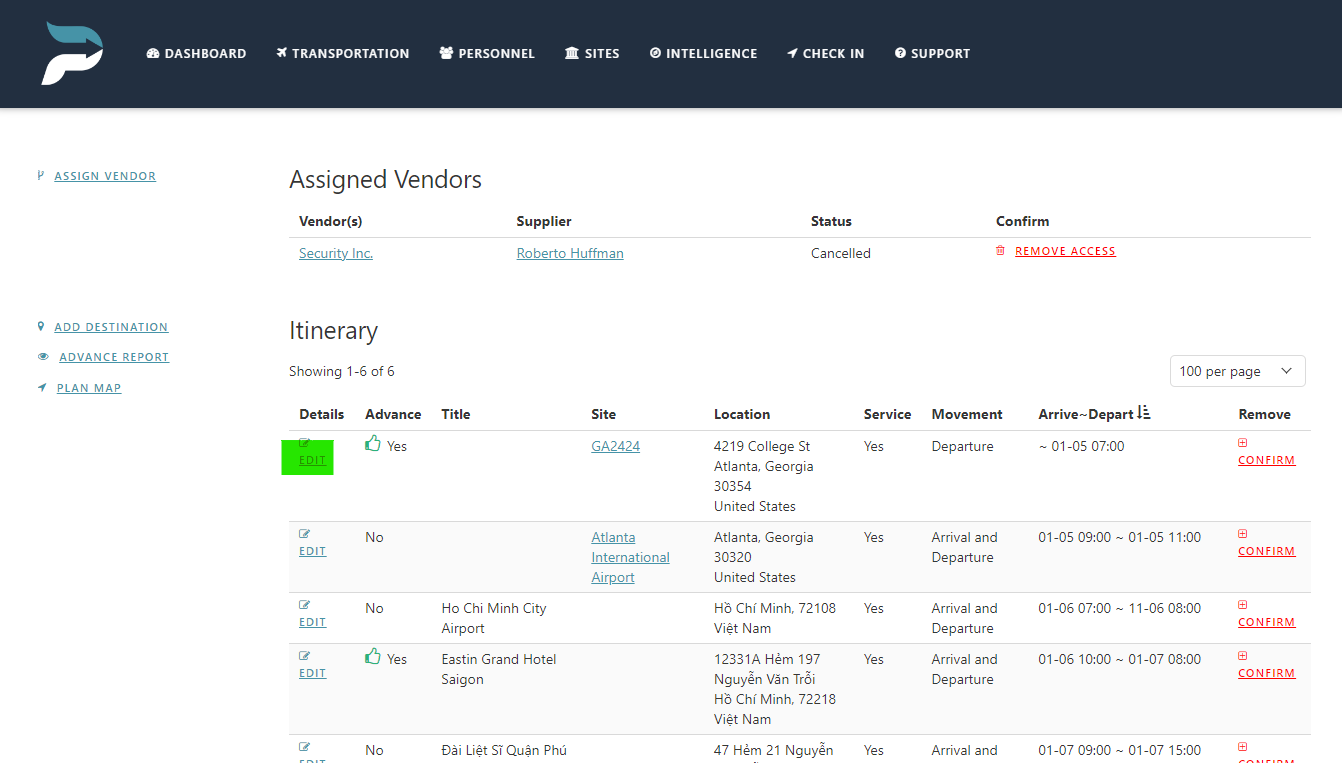
Click on the “Edit” link in the “details” fields associated with the location to which you wish to change or add notes.
Click “Edit” to change the date/times or adjust the location address or geo coordinates.
Click on ”Add Notes” to enter relevant notes in rich text format (users can add links and embed videos and photos).
Click on “Add Imagery” to upload photos for the location.
Click “Add Documents” to add links to documents stored on your services or online.
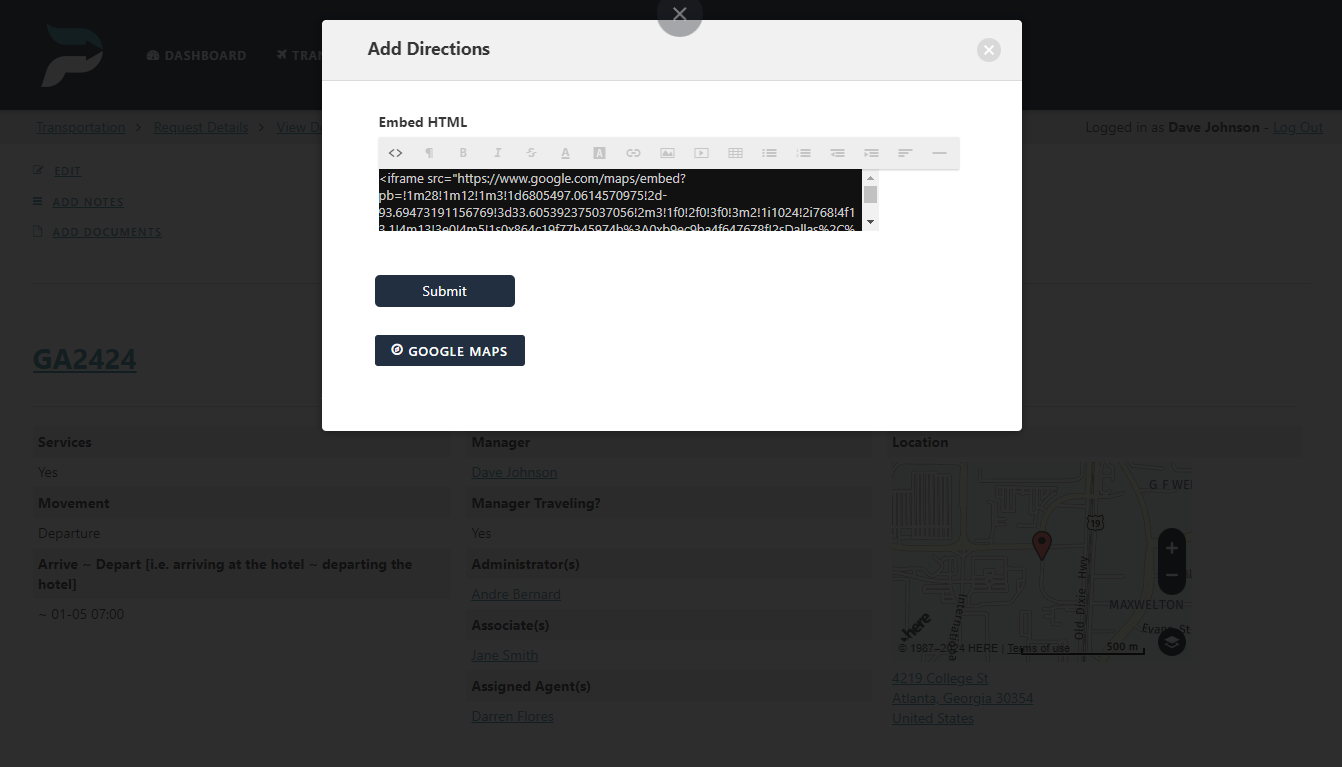
Click on “Add Directions” to add relevant links for the location. Direction can only be embedded via Google Maps.
Go to Google Maps.
Create your directions.
Scroll to the first directions segment.
Click on “Details”.
Click on the “share” icon.
Click on “Embed a Map”.
Copy the HTML text.
Go back to Predictions.
Click on the <> icons in the “Embed HTML” box.
Paste the text.
Click “Submit.”
The information collected will automatically be inserted into an “advance report” that the administrator can share with associates and agents.

Mark Advance/Itinerary Complete (Protection Level Subscribers)
Marking an advance complete ensures that the plan/request manager is in compliance with organization policies as well as provides the administrator with the ability to make the plan visible to associates. Advance reports are only visible to the administrator until it has been marked complete. Once complete, agents and vendor agents can view the report.
Click on the “Transportation” page.
Click on the transportation plans/request.
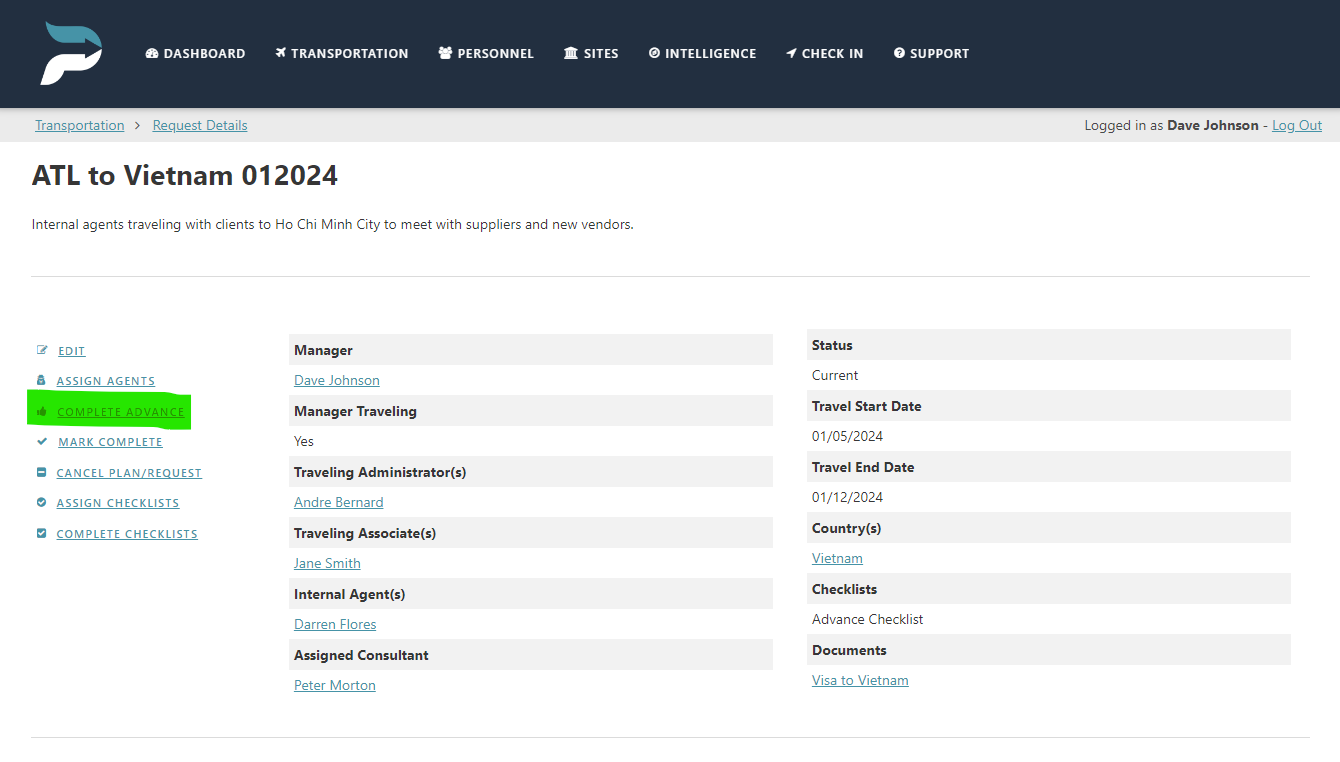
Click on the “Complete Advance” link.
Select “yes” in the “advance complete” field.
Select “yes” in the “make principles visible to vendor” field if you wish to share the full report.
Select “yes” in the “send notification” field if you wish to send a notification to all internal personnel.
Click submit.
Click on “notify the vendor of changes” if you want to notify the vendor of the advance completion.
Mark a Locations Advance Complete (Protection Level Subscribers)
Administrators, agents, and vendor agents can mark a specific destination’s advance complete.
Click on the “Transportation” page.
Click on the transportation plans/request.
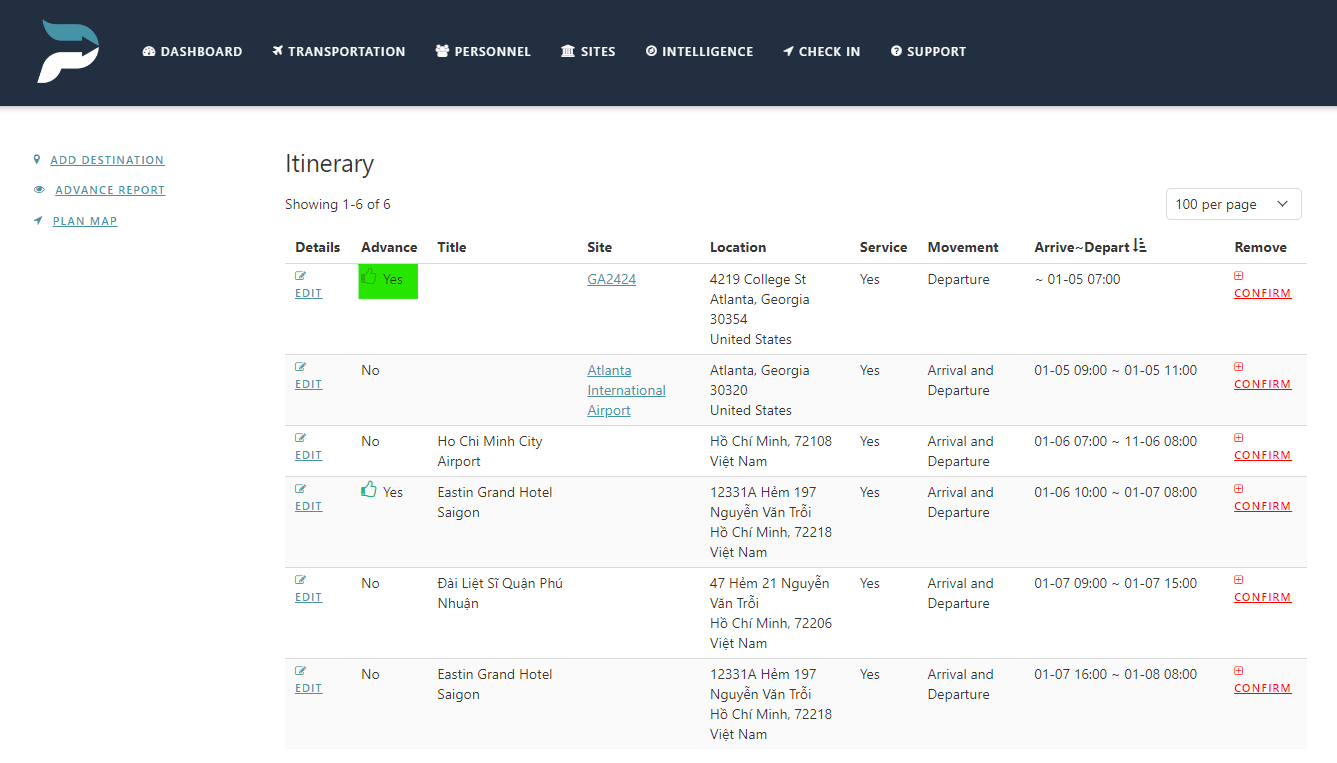
Select “yes” in the “advance” field.
A green thumbs-up will appear.