Using Checklists
Create Checklists (Protection Level Subscribers)
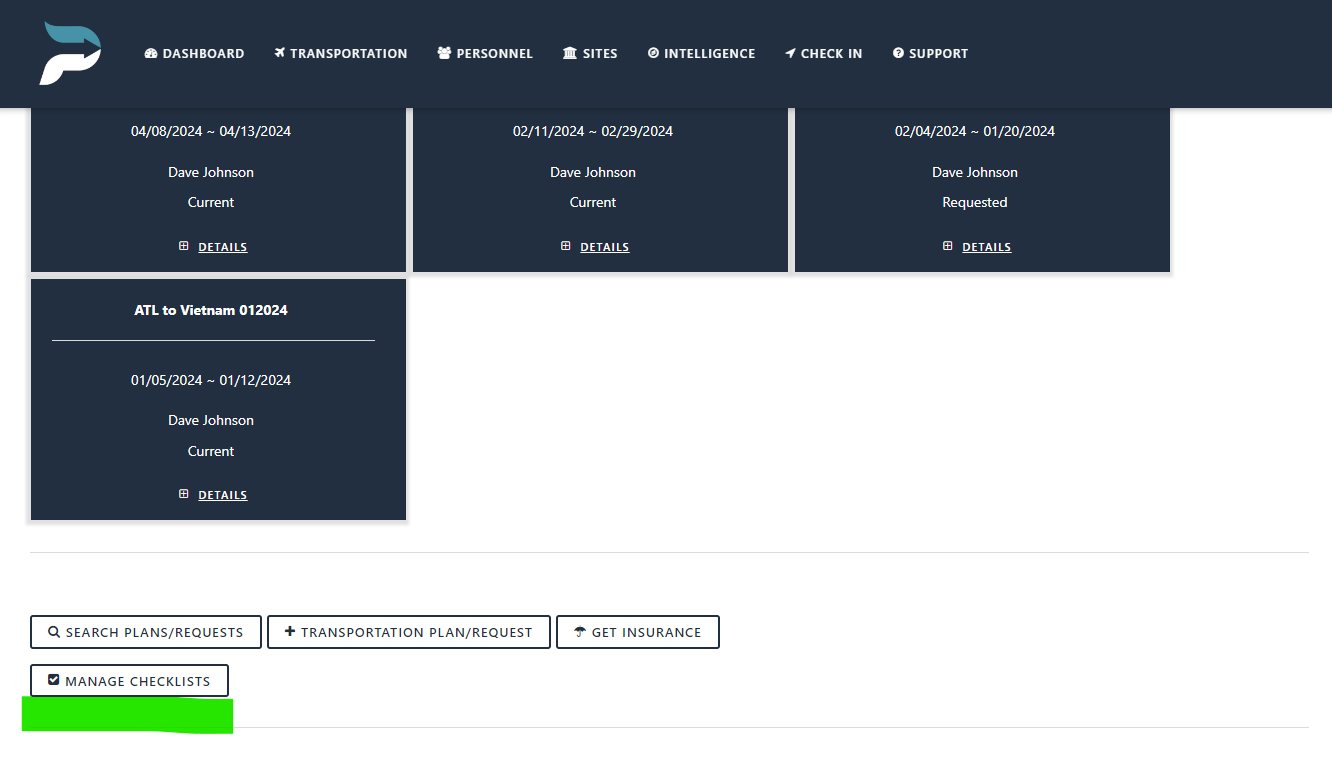
Click the “Manage Checklists” button on the “Transportation” page.
Click on “Add Checklist”.
Create a name for your checklist and click “Submit”.
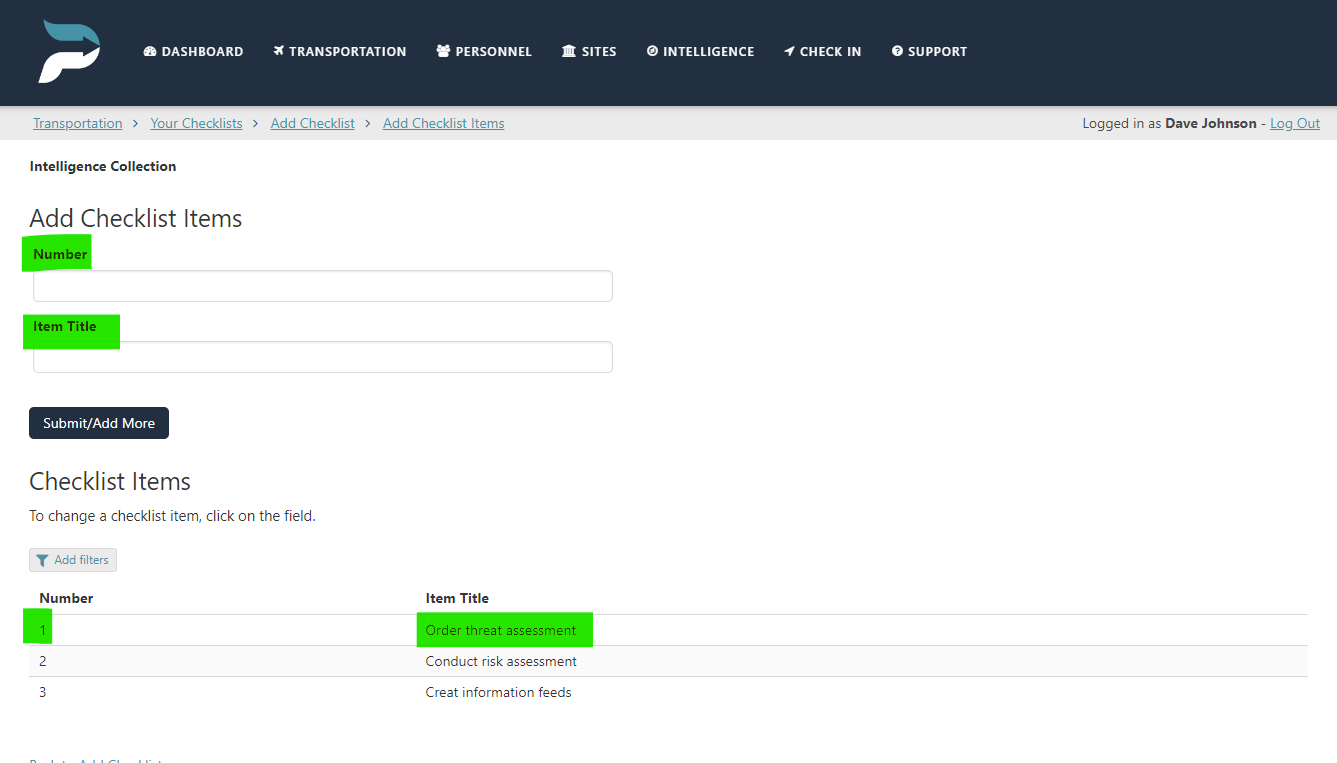
Assign a number and title for your checklist item and click “Submit”.
Add as many checklist items as necessary.
You can edit checklist items from this view by clicking on the “number” of the “item title” view and changing the information.
Assign Checklists (Protection Level Subscribers)
Administrators can assign unique checklists for agents, vendor agents, and administrators to complete.
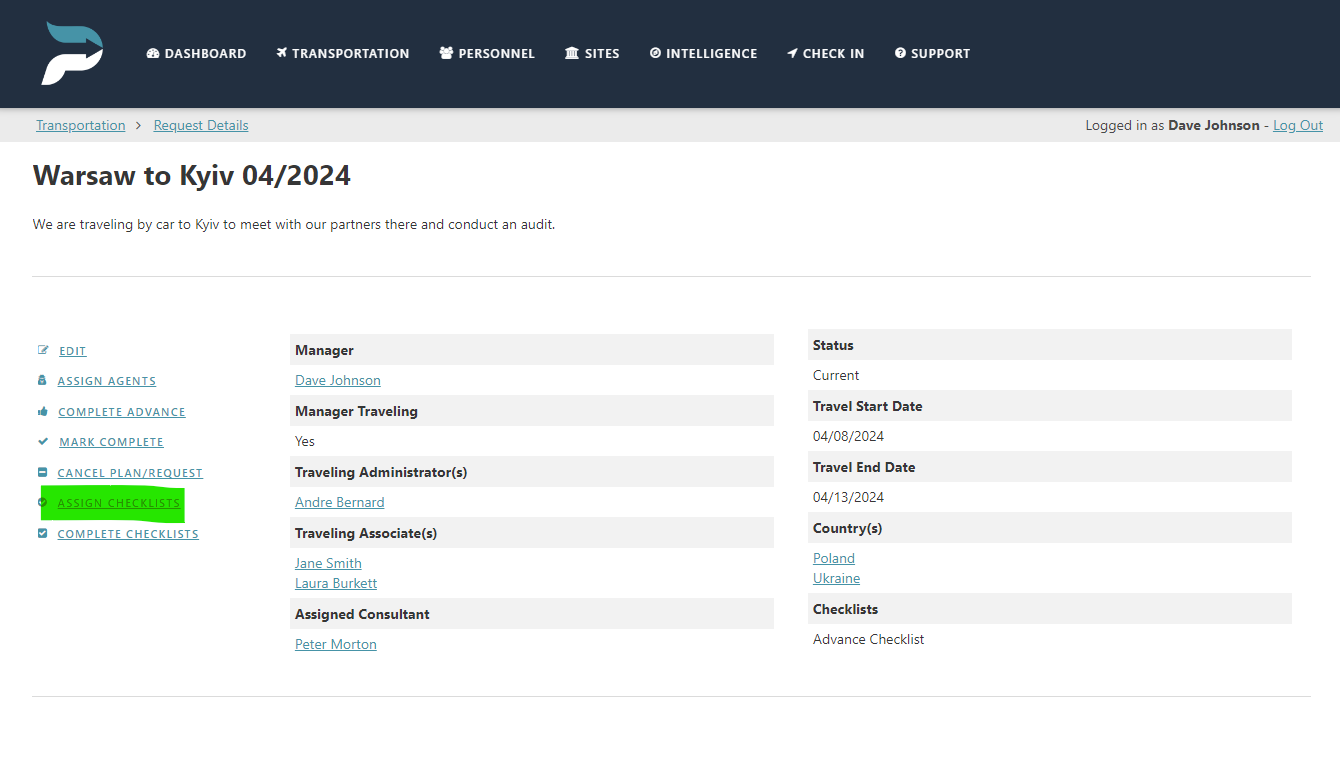
Click on the “Transportation” page.
Click on the transportation plans/request.
Click on the “Assign Checklist” link.
Select the checklist(s)
Click “Submit”.
Complete a checklist (Protection Level Subscribers)
Administrators, agents, and vendor agents can complete assigned checklists.
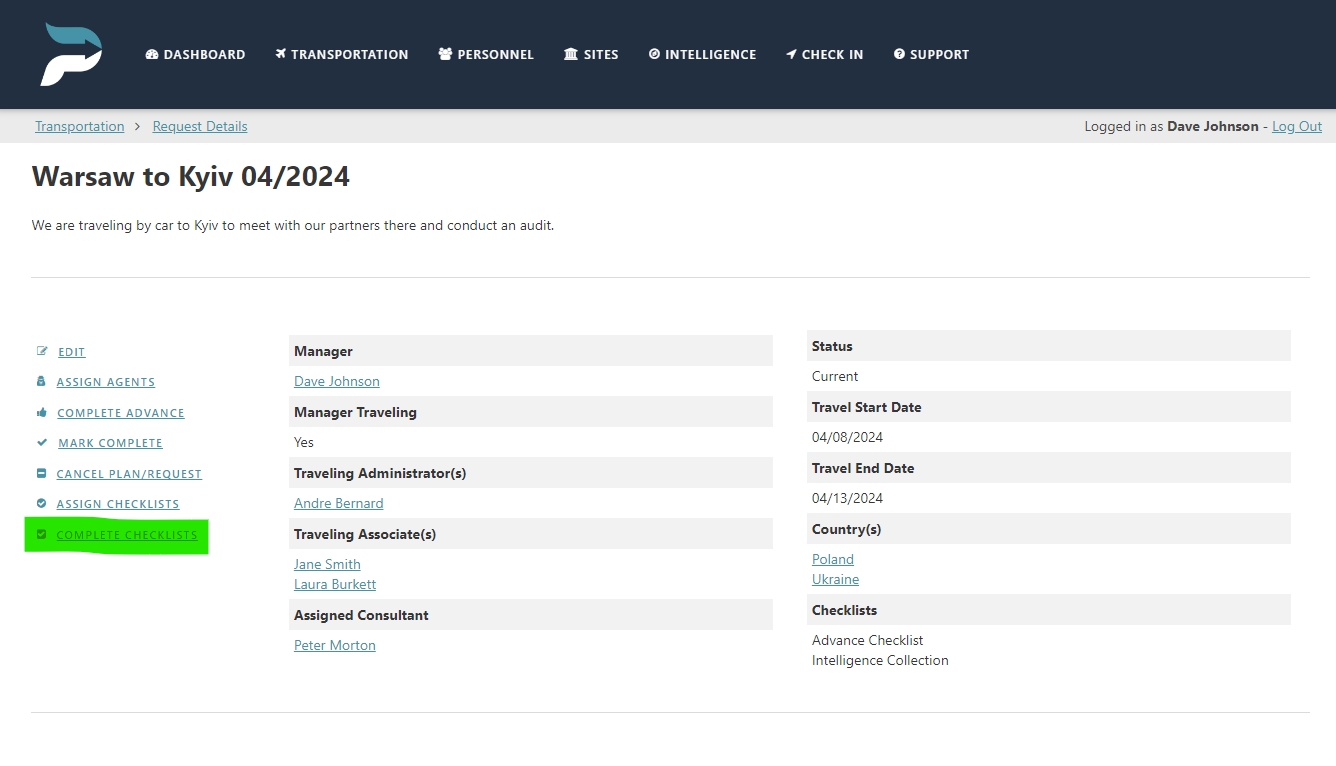
Click on the “Transportation” page.
Click on the transportation plans/request.
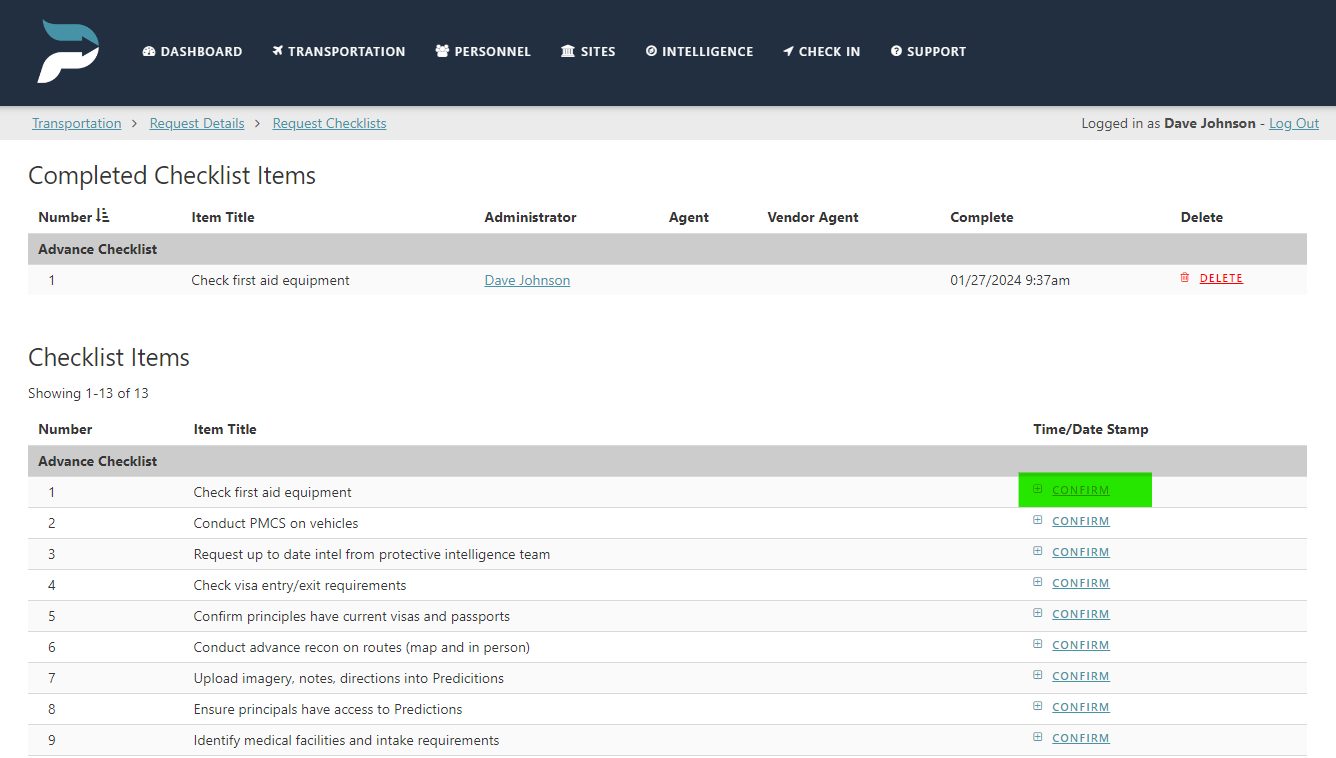
Click on the “Complete Checklists” link.
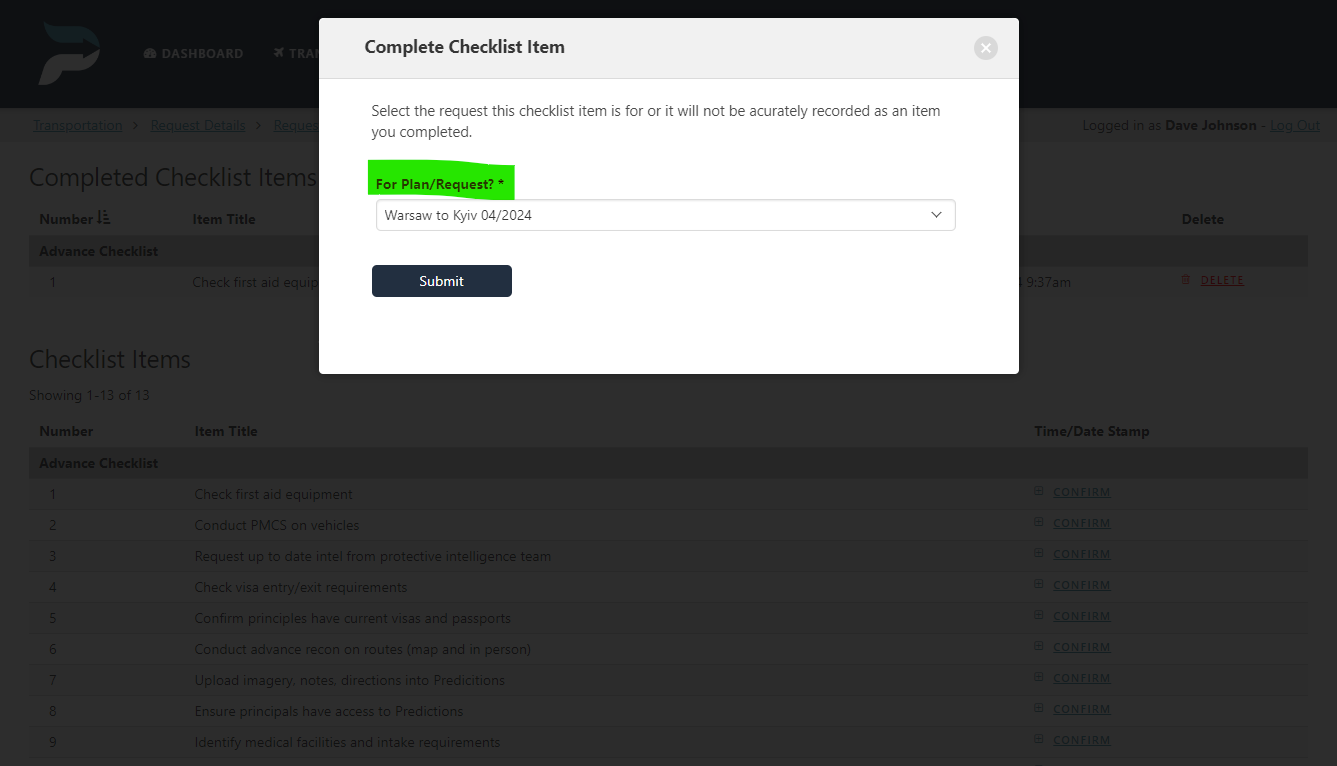
For each item you are responsible for, click “Confirm” in the “time/date stamp” field.
Connect your confirmation with the corresponding transportation plan/request.
Click submit.
Your response will populate in the “completed checklist items” section. Submitters of a checklist item are able to delete and resubmit their own submissions only.